Waxes and Butters
How To Make Beeswax Candles | Candle Making DIY
May
The mellow, shimmering glimmer of a fragrance provides a sense of serenity and tenderness to your surroundings. So it was difficult for our family to give up ordinary candles. Still, the bad influence on the environment was too enormous to ignore, so we switched to beeswax candles.
Yellow beeswax candles are a terrific alternative to chemically perfumed paraffin candles since they purify rather than pollute the air. When beeswax is burned, it produces negative ions. Negative ions help to reduce the amount of dust, dander, and mold in the oxygen we breathe, especially with essential oils.
Why Beeswax?
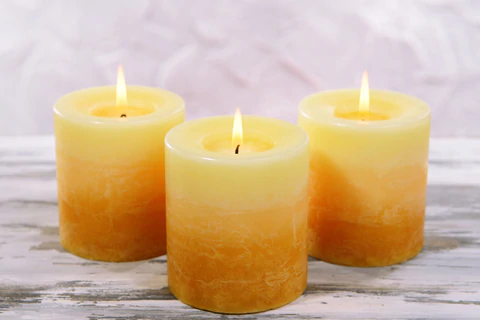
Since beeswax has the greatest melting point of any wax, it lasts longer than paraffin. When beeswax is burned, it emits a mild and delightful honey aroma. They’re the cleaner candle because they don’t produce any soot and are dripless. They also provide a lot more ambient light, which creates a warm atmosphere.
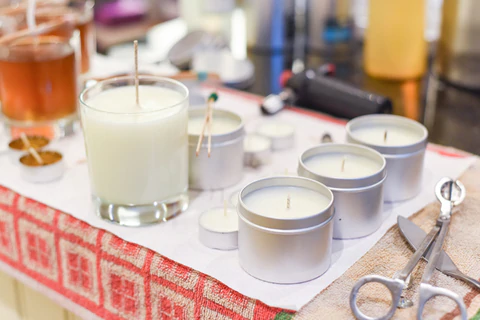
How to Make Beeswax Candles With Essential Oils
Since beeswax candles can be costly to buy, this is a terrific DIY project that will help you purify your home. We’ll go over how to manufacture beeswax candles in this article. Making candles at home using essential oils is inexpensive, simple, and beneficial.
Candle Making Supplies:
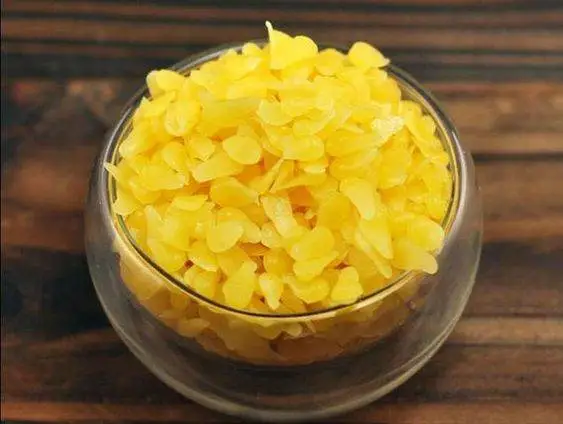
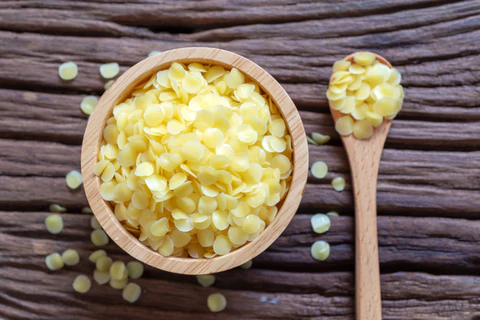
- Yellow Beeswax Pellets – 225 grams
- Virgin Coconut Oil – 60 Ml
- Lavender Essential Oil – 5 ml
- Pre-waxed Candle Wicks
- Wooden Candle Wick Holders
- Candle Colors/Dyes
- Wick Sticker
- Glass Candle Jars
- Large Wax Melting Container
- Wooden Skewers (For mixing wax)
Homemade Yellow Beeswax For Candle Making DIY – Step-by-step
Let’s try this recipe now that we’ve discovered the advantages of beeswax candles over others and have acquired all necessary equipment and components. Making a beeswax candle is a simple and fun activity.
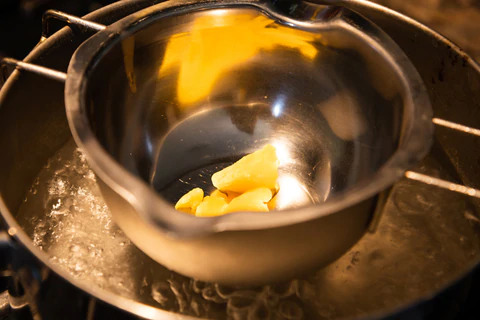
Step 1: Fill a big pot halfway with water, enough to cover the beeswax pallets but not overflow when it begins to boil. Place the container in the pot and heat until the water reaches a low, moderate boil. Let the heat from the water dissolve the beeswax pallets, occasionally stirring with a wooden skewer. Beeswax is combustible, so keep a close eye on it while it melts and make sure no wax pellets fall onto your hot stovetop.
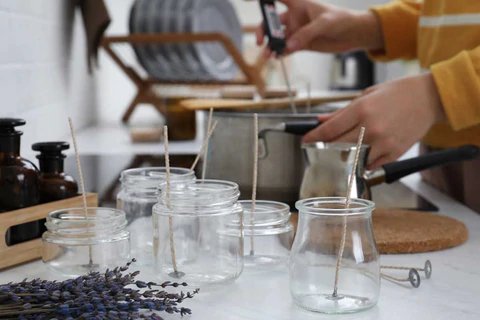
Step 2: Prepare your glass candle jars (you can use Yankee Candle Jars or Transparent Candle Jars) while your wax melts by applying a wick sticker to the base of your wick and placing it in the center of the bottom of your jar. For these, you may also use a wood wick. To keep the wick upright, wrap it around a skewer that’s positioned across the top of the jar. You can tape the skewers in place if needed until it sets or you can use wooden candle wick holder for centering candle wicks.
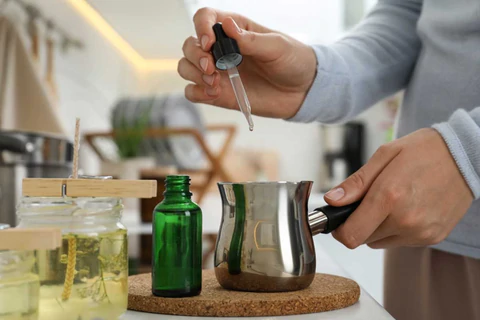
Step 3: After the wax has melted, remove it from the fire and whisk in the coconut oil. Although adding a little coconut oil to your beeswax may help the candle burn more consistently and reduce tunneling, you can also produce a 100% beeswax candle. Add the lavender essential oil, the fragrance oil, and the color (if desired).
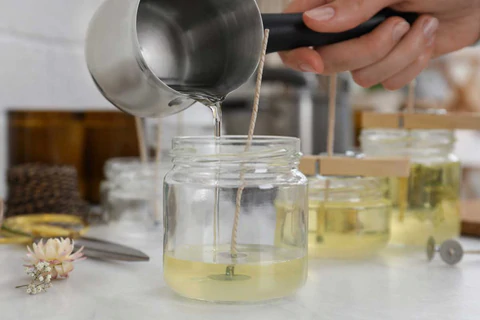
Step 4: Fill your candle jars halfway with wax and oil and set them aside for 1-2 days for curing before using them. Trim the wicks to 1/2 inch long, and your candle is ready to use.
Step 5: The standard candle rule of thumb is to burn a single wick candle for 1 hour per inch width (so 3 hours for a 3′′ broad candle) until the entire top melts on the first burn. In other words, your candle will never burn any further out from the center than it did on the initial burn. Ensure that the entire top melts the first time if you don’t want it to tunnel down the center.